Installation
Prerequisites
- WordPress administrator access on a staging or production site.
- Divi Theme or Divi Builder 5.0.0-public-beta or newer with the Loop Element available.
- PHP 8.0 or later.
- Divi Loop Extender ZIP file downloaded from your Divi Engine account.
Step 1: Upload the plugin
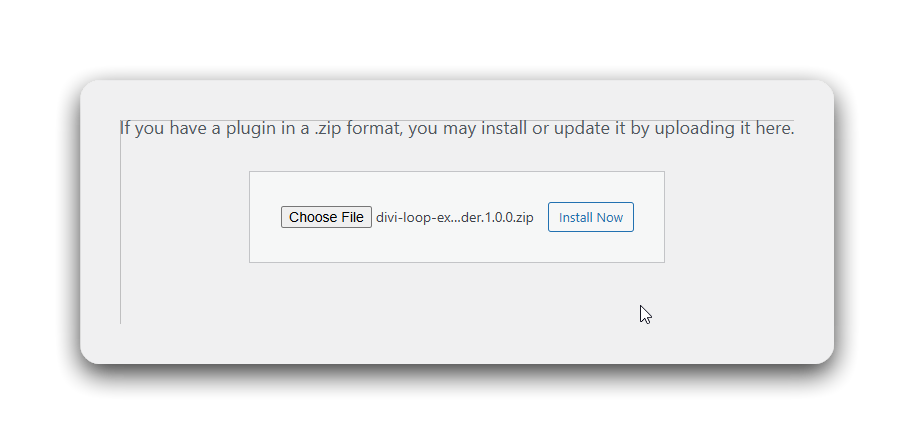
- Open the WordPress dashboard and go to Plugins > Add New Plugin.
- Click Upload Plugin.
- Select the
divi-loop-extender.zipfile from your computer. - Click Install Now, then choose Activate Plugin after the installation completes.
Step 2: Confirm activation
- Check that the Divi Engine menu appears in the WordPress sidebar.
- Launch the Divi 5 builder on any test page.
- Add or open a section containing a Loop Element.
- Expand the Loop accordion in the Content tab.
- Confirm that the Loop Extender controls are visible inside the Loop settings.
Step 3: Activate the license
If you purchased Divi Loop Extender from the Divi Engine website:
- In the WordPress dashboard, go to Divi Engine > Licenses.
- Paste your license key from your Divi Engine account.
- Click Activate and wait until the status shows Active.
note
Licensing is not required if the plugin was installed from the Divi Marketplace.
Troubleshooting
- Upload failure: Ensure the plugin ZIP file remains compressed before upload and that your hosting allows file uploads under
/wp-content/plugins/. - Missing Loop Extender panels: Clear WordPress and Divi caches, then reload the builder.
- License error: Recheck your active subscription in the Divi Engine account and remove any spaces before or after the key.
- Version mismatch: Update both Divi 5 and PHP to meet the minimum requirements before retrying installation.
Keep the plugin updated
- Enable Automatic Updates under Plugins > Installed Plugins.
- To update manually, download the latest release from your Divi Engine account and replace the existing version via Upload Plugin.
- Always test major updates on a staging site before applying them to production.