Create Post / Page / CPT Form
Building a Create form
Use the Form module in the Visual Builder to build forms that create posts, pages, or custom post types from the frontend.
When to use this form type
Use this form type when users should submit content from the frontend, including:
- Blog post submissions
- Directory or listing entries
- Custom post type submissions
For WooCommerce products, use the dedicated Create Product form guide instead.
Use Contact form instead if you only need email-style inquiries.
Prerequisites
- The target post type exists and is publicly usable as needed
- You know which fields map to required post data (especially title)
- Optional: ACF field groups are configured if you plan to map ACF fields
Step 1: Add the Form module
- Open the page in the Visual Builder.
- Insert the Form module and place it where the form should appear.
Step 2: Define form settings
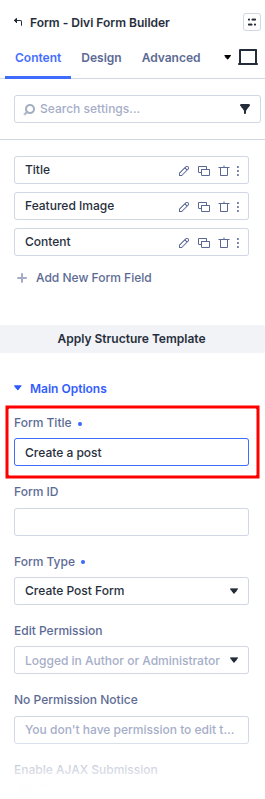
- Select the Form module and open the Content tab.
- Set Form Title. A unique Form ID is optional. Leave it blank and Form Builder assigns one. If you set one, use an ID that is not already used by another form.
- Set Form Type to a Create option (for example, Create Post, Create Page, or the CPT you need).
- Set Submit Button Text (for example, "Create" or "Submit").
You can choose different Create types (post, page, or CPT) from the Form Type dropdown. For products, see Create Product form.
Step 3: Add form fields
- In the Content tab, add fields with Add New Form Field.
- For each field set Field Title, Admin Title, and Field Type (Input, Textarea, etc.). A unique Field ID is optional. Leave it blank and Form Builder assigns one. If you set one, use an ID that is not already used by another field on the form.
- These fields will be mapped to post/page/CPT attributes or ACF fields.
See Field types for details on each type.
Step 4: Map fields
Create forms support field mapping:
- For each field, set Field Mapping Type:
- Post Default Field — map to title, content, excerpt, or other default post/page/CPT fields.
- ACF Field — map to an Advanced Custom Fields field (if ACF is used).
- Map at least one field to Post Title (required for Create forms).
- Map a Textarea or similar field to post content if needed.
If you are using custom post types with required meta, map those required fields before testing.
Step 5: Customize the form
Use the Content and Design tabs for:
- Form-wide: redirect after submit, success/error messages, layout.
- Per field: appearance and conditional logic.
Some options (e.g. email notifications) may not apply to Create-type forms.
Verify it works
- Submit a test entry from the frontend.
- Confirm the content item is created in the expected post type.
- Confirm mapped fields (title/content/meta) save correctly.
- Confirm post status behavior matches your configuration (draft/published workflow).
Common setup mistakes
- Not mapping a field to Post Title
- Using mismatched field mapping type (default field vs ACF field)
- Expecting create-form behavior from a different form type
- Skipping frontend test submissions before launch
What's Next
- Create Product form — WooCommerce product create forms
- Form module reference
- Field mapping
- Edit post