Filter by ACF Date
Introduction
Discover how to set up an ACF Date filter with Divi BodyCommerce, enabling users to effortlessly filter content by dates. Follow our quick guide for seamless integration.
Step 1: Create a Date Picker or Date Time Picker ACF Field
In your ACF field groups, add a Date Picker or Date Time Picker field.
Please click HERE to learn more about how add ACF Fields.
Step 2: Add ARP Product Loop & ARP Filter Post Modules
Head over to the page, layout, or Theme Builder Template (for custom posts) of your choice and add the ARP Filter Posts Module and ARP Loop Module.
Step 3: Customize ARP Product Loop Module
Customize the Archive Loop Module. The most important settings to get your filter working are the Post Type, Custom Loop Layout and Is Main Loop.;
Please click HERE to learn more about this module and how to customize it for your filter.
Step 4: Create a New Filter
- Go to the ```
ARP Filter Posts
- Click on the ```
+
Step 5: Configure the Main Filter Settings
Set up the filter like this:
- Admin Filter Name: Enter a name for your filter, e.g., ```
Event date
- What do you want to search/filter?: Select ```
Advanced Custom Field (ACF Plugin)
- Post Type: Choose the post type you want to apply the filter to, e.g., ```
Events
- ACF Name: Select the ACF field you wish to filter by, e.g., ```
Event Date
- For the
Filter Type, select ``` Date/Date Range Picker

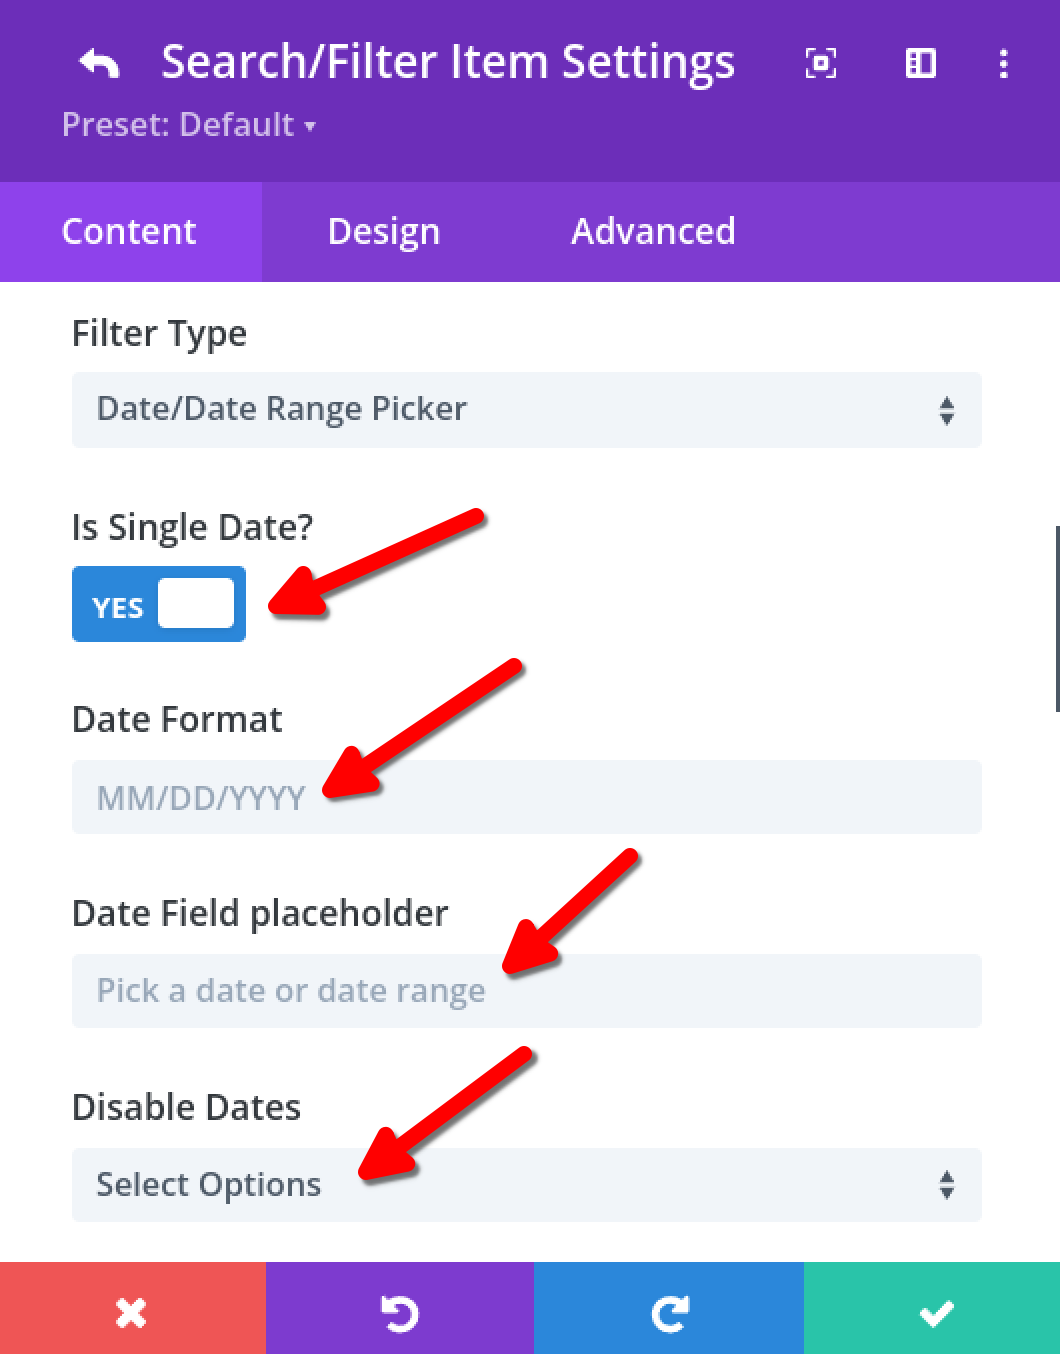
Step 6: Date Filter Specific Settings
- Decide if you want to allow filtering by a single date or a date range:
- If you want to filter by a single date, set
Is Single Date?to ``` YES - If you want to filter by date range, set
Is Single Date?to ``` NO
- If you want to filter by a single date, set
- Specify the
Date Formatyou wish to use, e.g., ``` MM/DD/YYYY - Enter a
Date Field placeholder, e.g., ``` Pick a date or date range - If necessary, You can disable Past or Future dates in the ```
Disable Dates