Creating a Mega Menu
Overview
A mega menu is a custom post. You give it a unique Custom Identifier, choose where the layout comes from, then design it in the Visual Builder.
For a shorter path, use the quick start.
Step 1: Add a mega menu
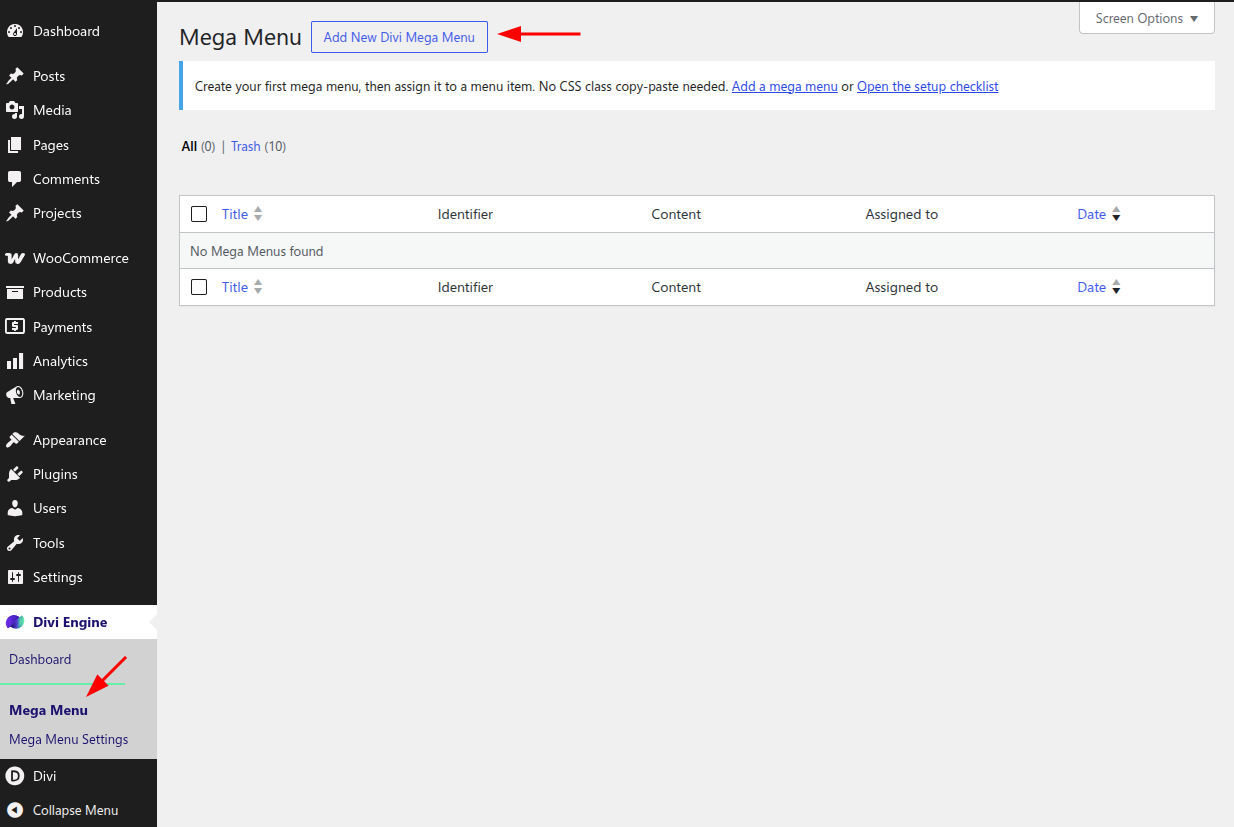
- In the WordPress admin, go to Divi Engine > Mega Menu.
- Click Add New.
- Enter a title.
Step 2: Set the custom identifier
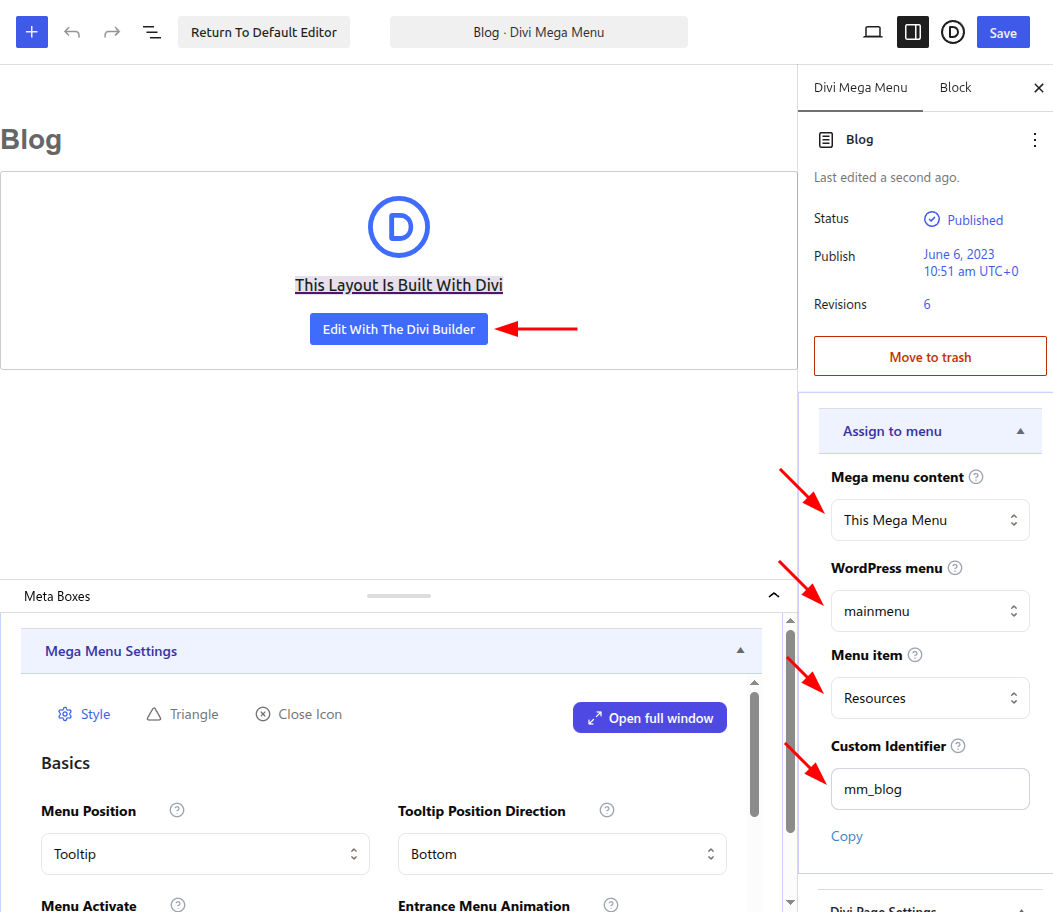
On the mega menu, set Custom Identifier. Use only letters, numbers, and underscores (for example shop_mega). Each mega menu needs its own identifier.
If you leave the field empty, Mega Menu can suggest one from the title when you leave the title field.
Without a valid identifier the mega menu cannot be saved. Duplicate identifiers can prevent the correct panel from showing.
Step 3: Choose mega menu content (Divi 5)
Mega menu content controls the layout source:
| Option | What it uses |
|---|---|
| This Mega Menu | The Divi layout on this post. Default. |
| Global Canvas | A Theme Builder Canvas. Hover, position, and mobile behavior still come from this mega menu. |
To use a canvas:
- In Divi, open Theme Builder and create a Canvas.
- Design the canvas layout.
- On the mega menu, choose Global Canvas and select that canvas.
You still assign this mega menu to a WordPress menu item. The canvas is only the panel content.
Step 4: Design in the Visual Builder
- Click Edit with Divi.
- Build sections and rows as you would on a page.
- Add Mega Tabs or Mega Drop-down from the Divi Mega Menu folder when you need those patterns. See Modules.
Divi 4 uses the same mega menu posts and identifier. The builder shows the Divi 4 Mega Tabs and Mega Drop-down modules. There is no Global Canvas content source. Assignment is usually a CSS class on the menu item.