Quick Start
Goal
By the end of this guide you’ll have a simple membership: one plan, a signup form, and member-only content. Visitors can sign up, and once logged in they’ll see the content you’ve locked for members.
What you need
- Divi Membership installed and your license entered (see Installation).
- A Divi-built page (e.g. “Sign up” or “Pricing”) where you can add the signup form.
Steps
Step 1: Create a membership plan
- Go to Divi Engine → Divi Membership → Memberships.
- Click Add New Membership.
- Give it a title (e.g. “Basic” or “Pro”) and, if you like, a short description.
Step 2: Add a price (billing cycle)
- Open the plan you just created and find Billing Cycles.
- Click to add a cycle. Give it a name (e.g. “Monthly”), choose Recurring, set how often you charge (e.g. every 1 month), and enter the price.
- You can add a sale price or another option (e.g. “Yearly”) if you want.
- Save the plan.
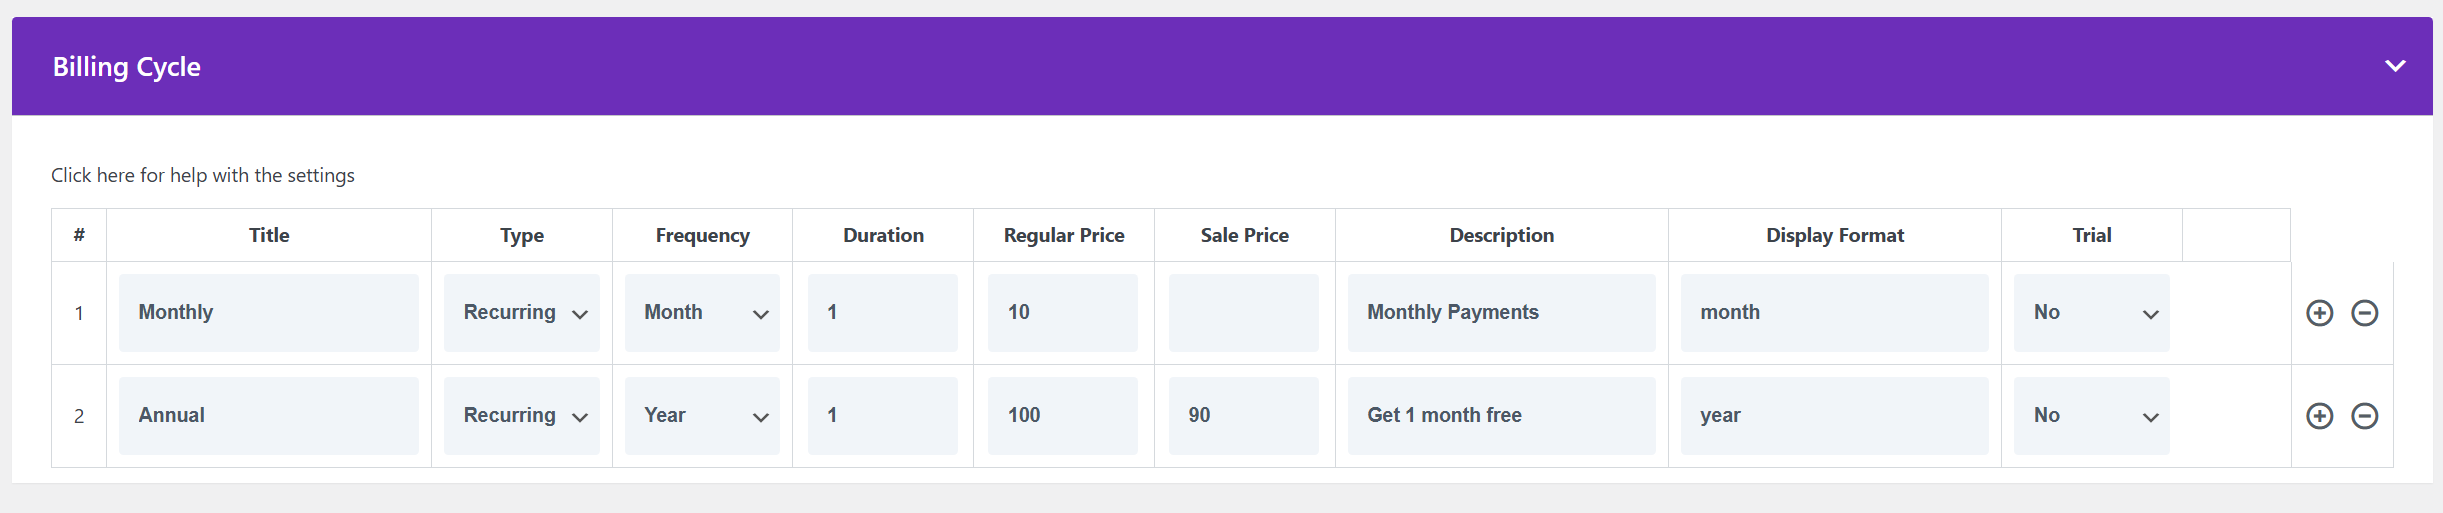
Quick reference: Title is the label (e.g. “Monthly”). Type is Recurring (repeats), One-time, or Free. Frequency and Duration set how often (day/week/month/year). Regular Price and Sale Price are what the member pays. Trial lets you offer a free trial before the first charge; Require Payment means they enter card details at signup even for a trial.
Step 3: Turn on member-only content
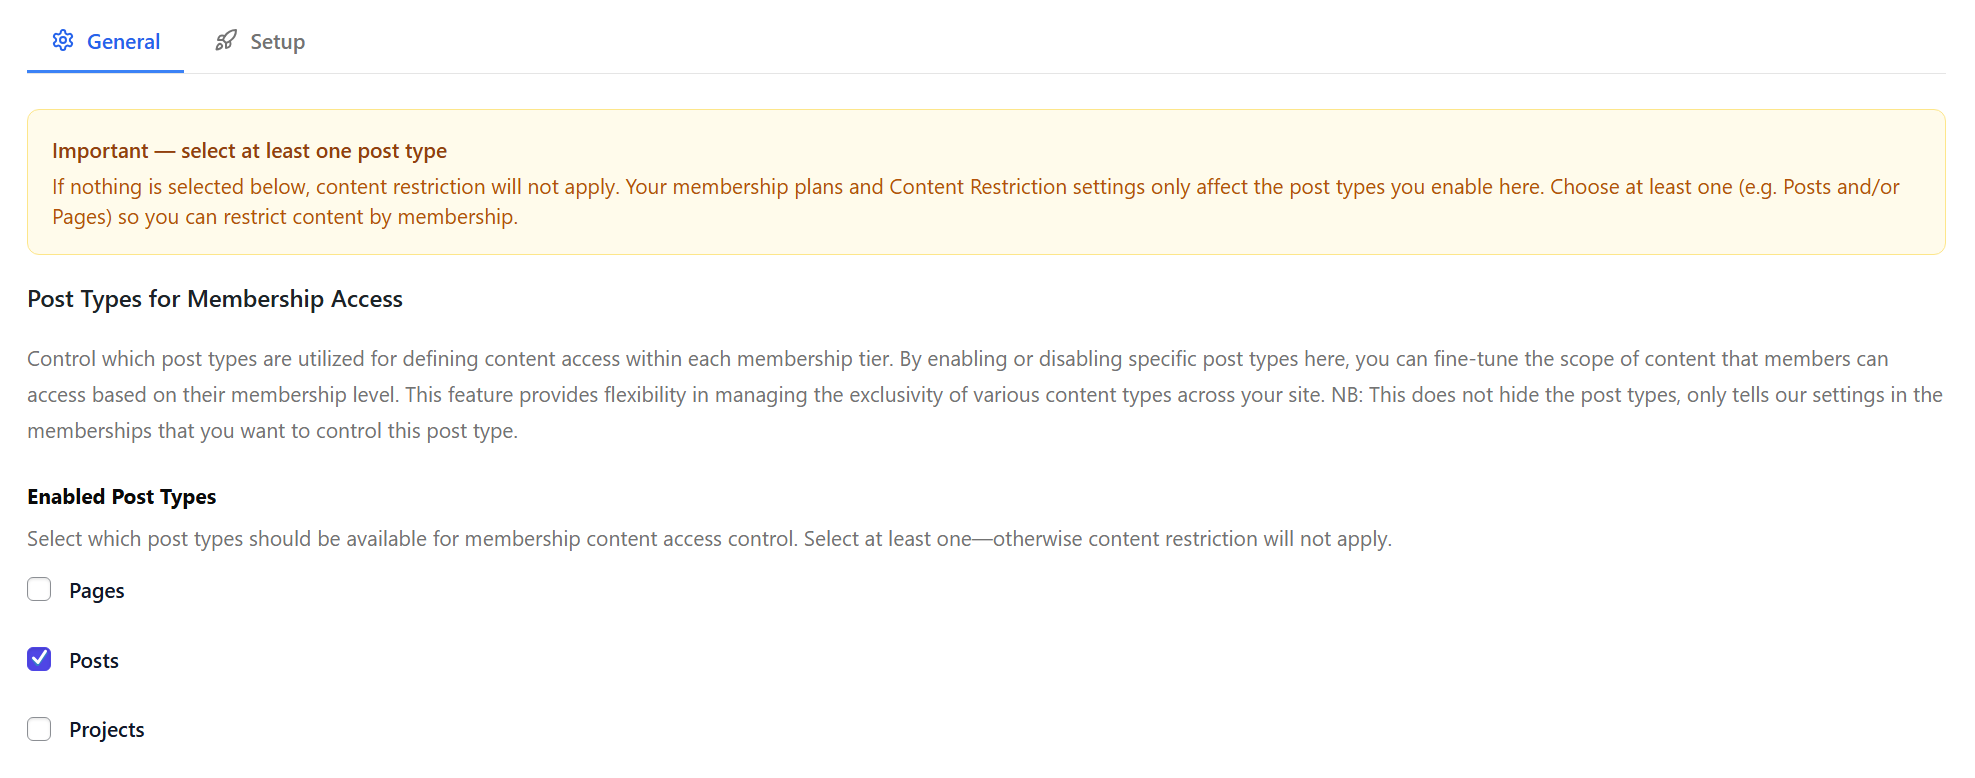
- Go to Divi Engine → Divi Membership → General.
- Under Enabled Post Types, turn on the kinds of content you want to protect (e.g. Posts). Only members will be able to see these.
- Save settings.
Step 4: Choose what this plan can access
On the same membership plan, find the Content Access box. Here you choose which posts (or categories/tags) this plan unlocks. Everyone who doesn’t have this plan will be blocked from that content.

Type “all” and select it to give this plan access to all posts in the types you enabled.
Step 5: Set up payments (Stripe or PayPal)
If your plan isn’t free, set up how you’ll take payment.
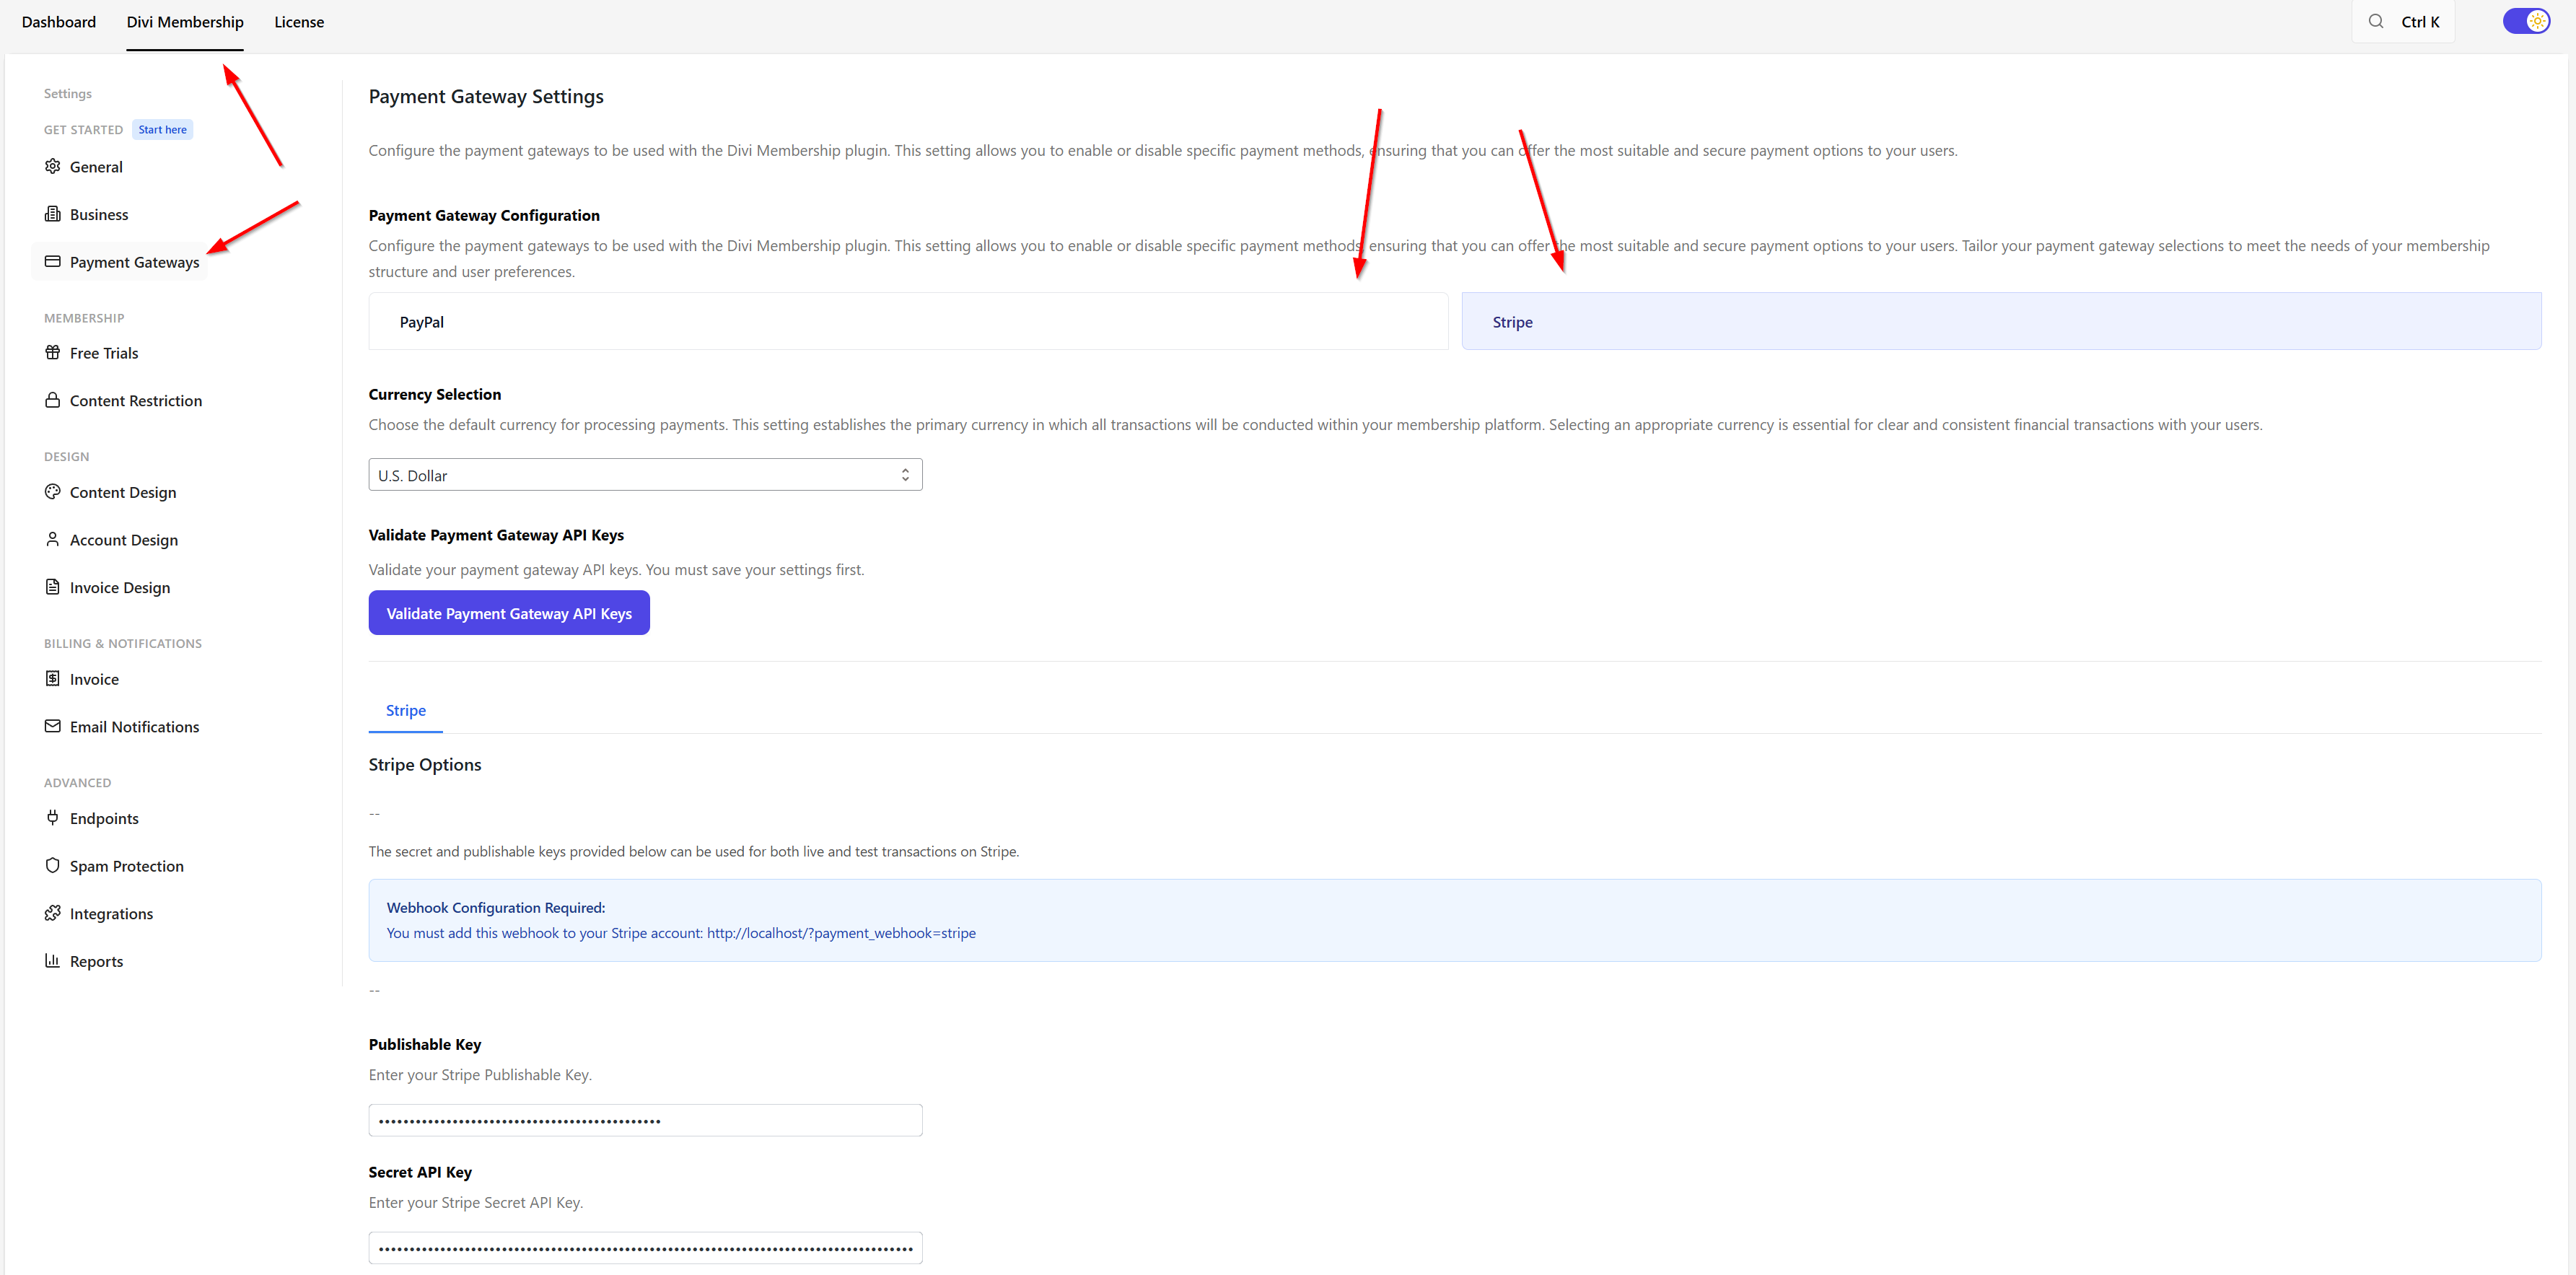
- Go to Divi Engine → Divi Membership → Payment Gateways.
- Turn on Stripe or PayPal (or both).
- Enter the keys from your Stripe or PayPal account. The plugin will tell you which ones to paste where.
- Save settings.
If you’re only offering a free plan or a trial with no card required yet, you can skip this and set up payments later.
Step 6: Add the signup form to a page
- Edit or create a page with Divi (e.g. “Sign up” or “Pricing”).
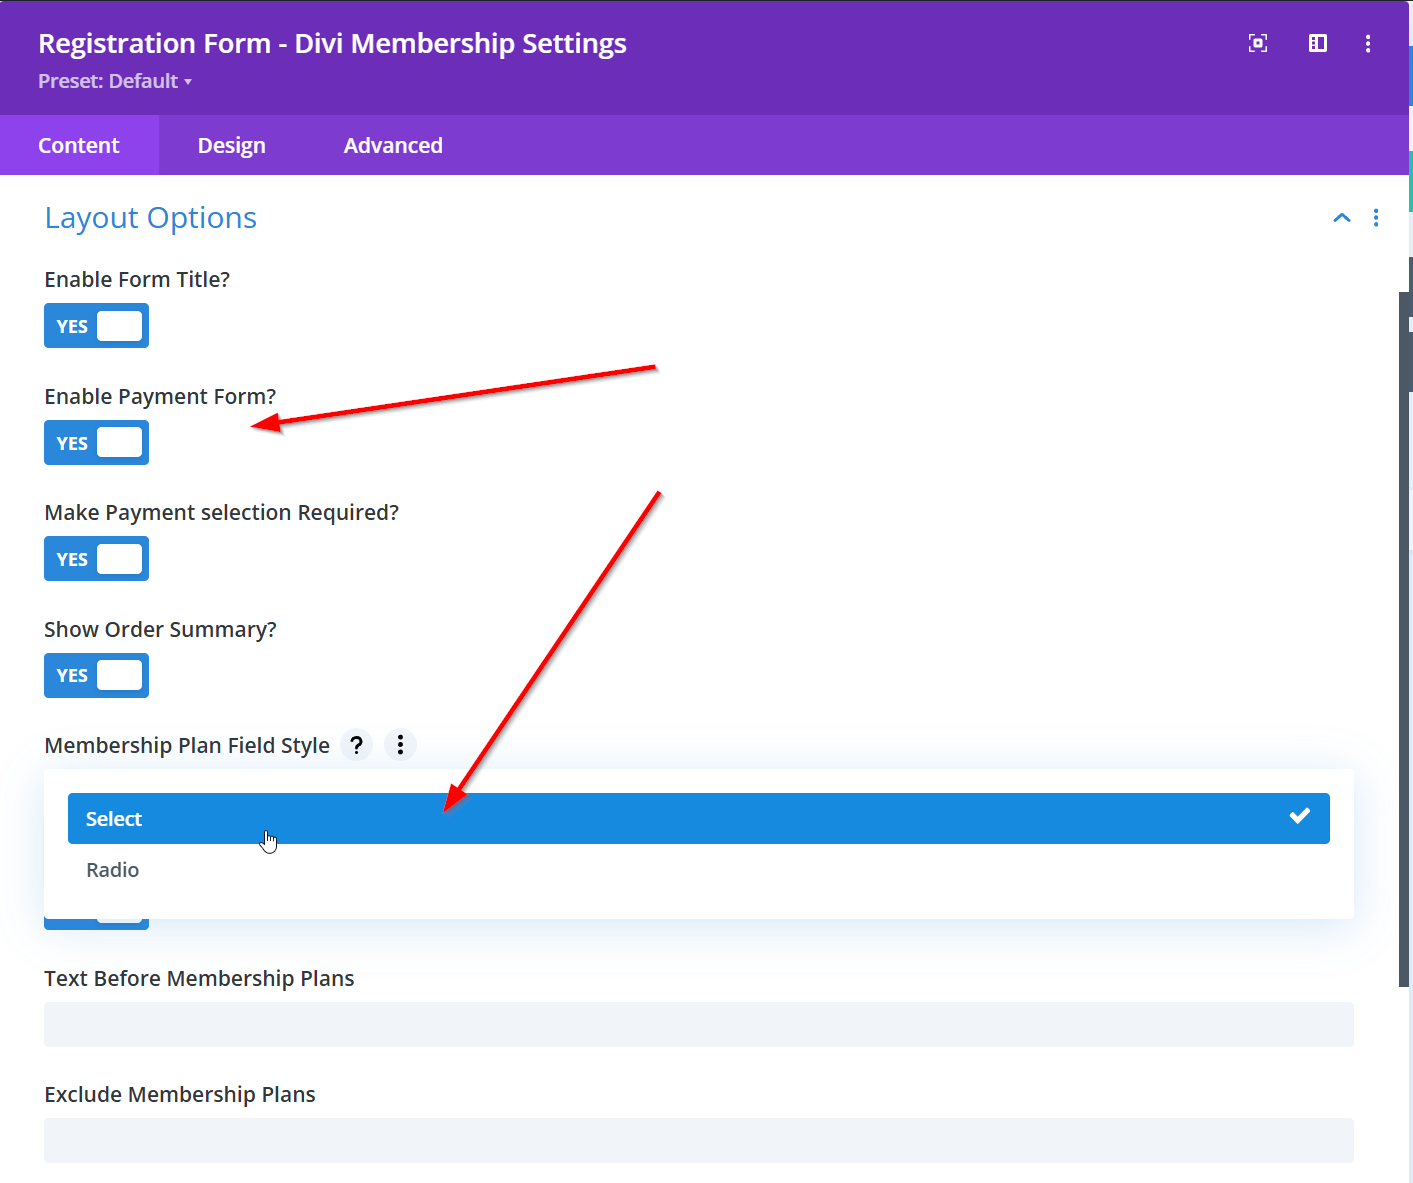
- Add the Register module (under Divi Membership in the module list).
- In the module: turn on Enable Payment Form and choose how to show the plan (dropdown or radio buttons).
- Set where people go after signup (e.g. the member account page or a thank-you page).
- Save and publish.
Step 7: Test it
- Open your signup page in a private/incognito window (or while logged out).
- Sign up and pay (if the plan has a price).
- Check that you’re sent to the page you set and can open the member account.
- Open a post that’s for members only: you should see it when logged in, and a “members only” or login message when logged out.
Checklist
- Visitors can reach your signup page and complete signup.
- After login, members can see the member-only content you set.
- Divi Engine → Divi Membership and its settings work in the admin.
If something doesn’t work, double-check Payment Gateways (keys correct?), Endpoints (member account URL), and that the Register module is set to the right plan and redirect.
What's Next
- Feature Overview — What else you can do: plans, payments, trials, coupons, account, reports.
- Register module — All options for the signup form (summary, coupons, layout).
- Settings — Control which content is member-only and where everything is in the menu.