Quick start guide
Divi 5 only
This quick start uses Divi 5 assignment (menu + menu item pickers). Divi 4 uses the same mega menu posts, but you typically assign by adding the custom identifier as a CSS class on the menu item. See Assigning a Mega Menu.
Overview
Create one mega menu layout, assign it to a parent item in a WordPress menu, and open it on the front end.
Prerequisites
- Divi Mega Menu installed, activated, and licensed.
- A WordPress menu with at least one item (for example, Shop or Services).
- Latest version of Divi 4 or Divi 5.
- Access to Divi Engine and Appearance → Menus.
Step 1: Confirm header settings
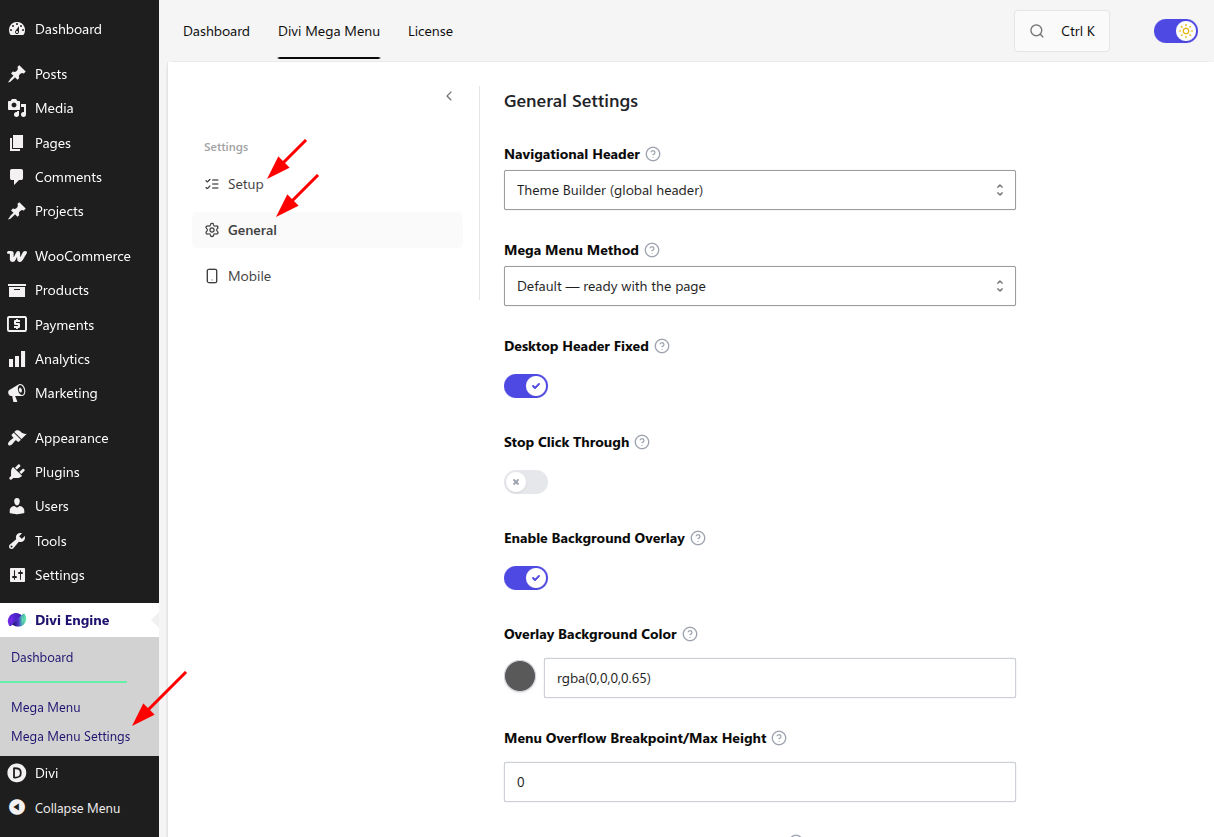
- Go to Divi Engine > Mega Menu Settings.
- On Setup, follow the checklist if it suggests a Navigational Header or load method.
- Open General and confirm Navigational Header:
- Default Divi (theme header) for the theme header.
- Leave Default Divi if you already use a Theme Builder global header — Mega Menu detects that header automatically.
- Change the setting only if the panel sits in the wrong place (Theme Builder, per-page Menu module, or Mighty Header & Menu Maker).
- Click Save.
Step 2: Create a mega menu
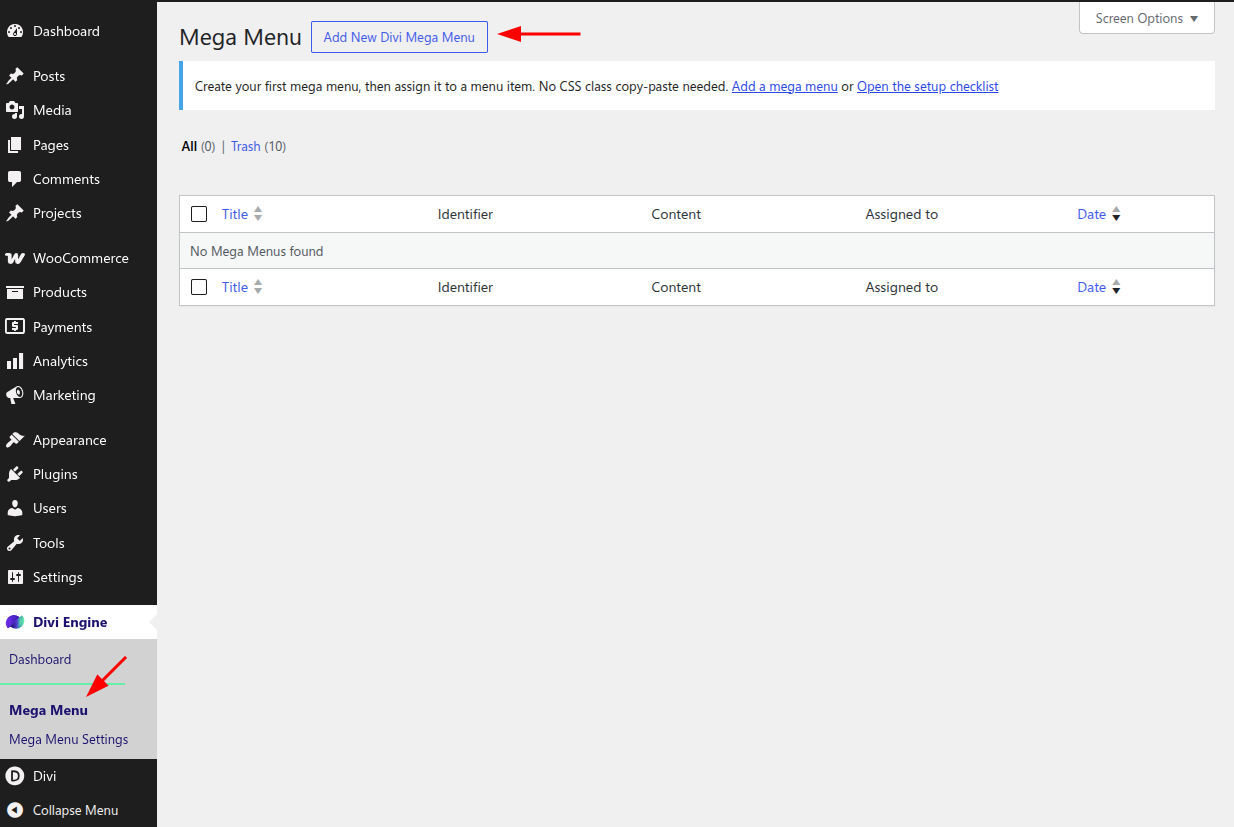
- Go to Divi Engine > Mega Menu > Add New.
- Enter a title (for example,
Shop mega menu). - Set Custom Identifier (letters, numbers, and underscores only, for example
shop_mega). The identifier is filled from the title if you leave it empty and blur the title field. - Under Mega menu content, keep This Mega Menu (you will design this post). Optionally choose Global Canvas later if the panel should reuse a Theme Builder canvas.
- Publish the mega menu.
Step 3: Design the panel
- Click Edit with Divi on the mega menu.
- Add a section and row.
- Add ordinary Divi modules (text, images, buttons) and, if needed, Mega Tabs or Mega Drop-down from the Divi Mega Menu folder.
- Save the layout.
Step 4: Assign it to a menu item
Divi 5
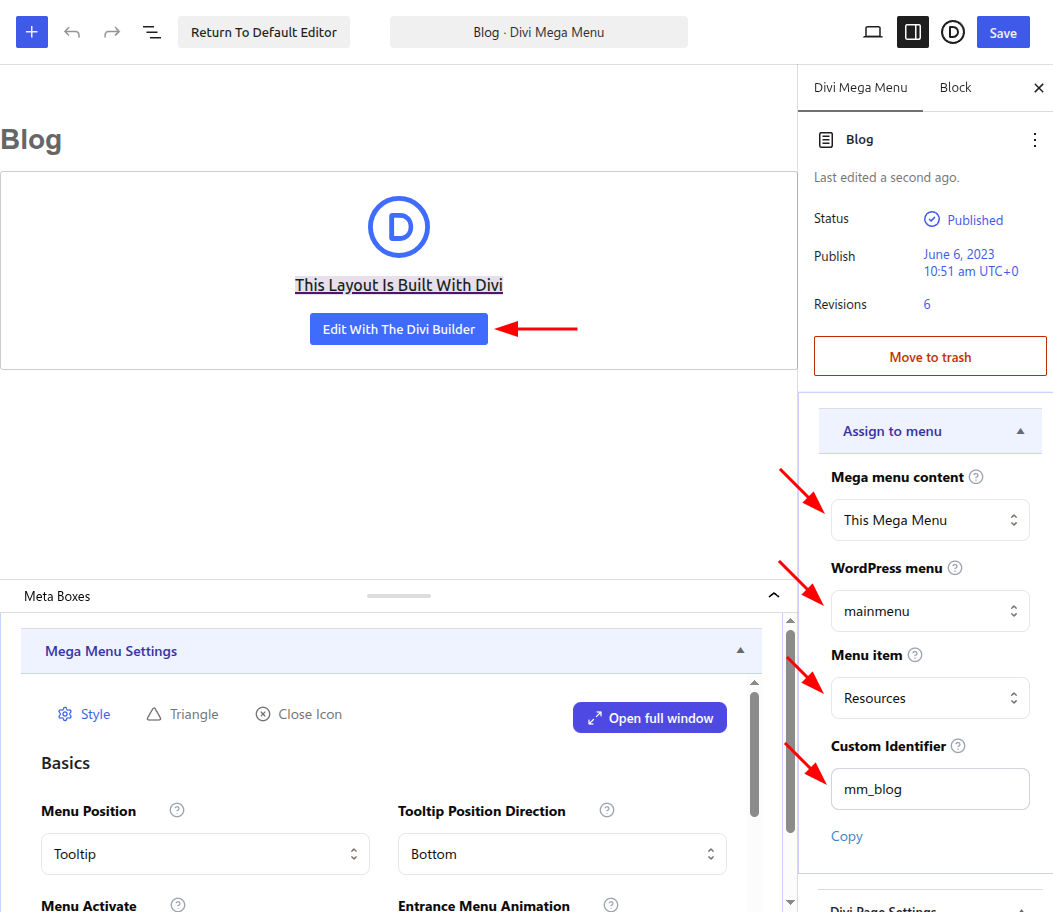
On Divi 5, assign from the mega menu editor or from a Mega Menu dropdown on Appearance → Menus. On Divi 4, add the custom identifier as a CSS class instead.
Divi 5 — on the mega menu (recommended)
- In the mega menu editor sidebar, choose WordPress menu.
- Choose Menu item.
- Update the mega menu. The plugin writes the identifier onto that item.
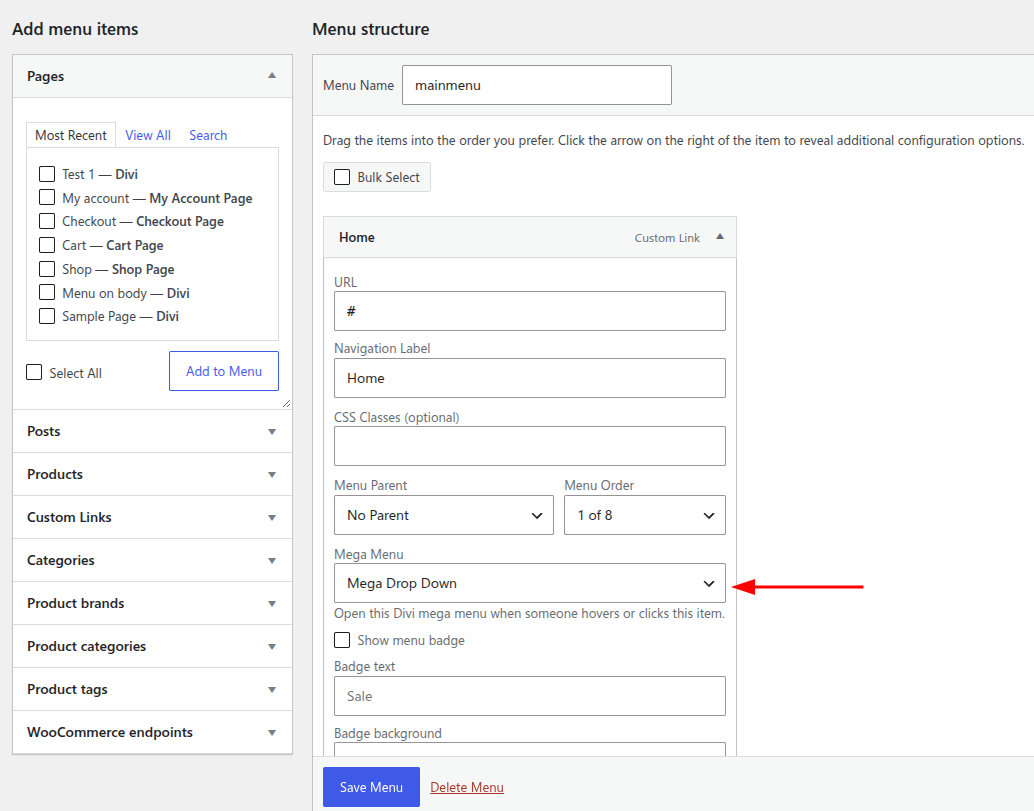
Divi 5 — on Appearance → Menus
- Go to Appearance > Menus.
- Expand the parent item.
- Choose the mega menu in the Mega Menu dropdown.
- Save the menu.
Divi 4 — CSS class
- Copy the mega menu Custom Identifier.
- Go to Appearance > Menus.
- Enable CSS Classes under Screen Options.
- Paste the identifier on the parent item’s CSS Classes field.
- Save the menu.
Full steps for both versions are in Assigning a Mega Menu.
Step 5: Preview
- Open the site on the front end.
- Hover or click the assigned parent item (depending on Menu Activate on the mega menu).
- Confirm the layout appears under the header.
If the panel is missing or misaligned, see Mega Menu Is Not Showing and Settings.
What's Next
- Creating a Mega Menu — Identifiers, Global Canvas, and Visual Builder details.
- Assigning a Mega Menu — Divi 5 pickers, CSS class assignment, and tooltip triggers.
- Style a Mega Menu — Position, animation, triangle, close icon, and badges.
- Modules — Mega Drop-down, Mega Tabs, and Tab.