Webhook Integration with Divi Form Builder
Divi Form Builder allows you to send submitted form data to any external service via a custom Webhook URL. This enables you to connect your forms to automation platforms, custom APIs, or third-party apps that accept incoming data in JSON format.
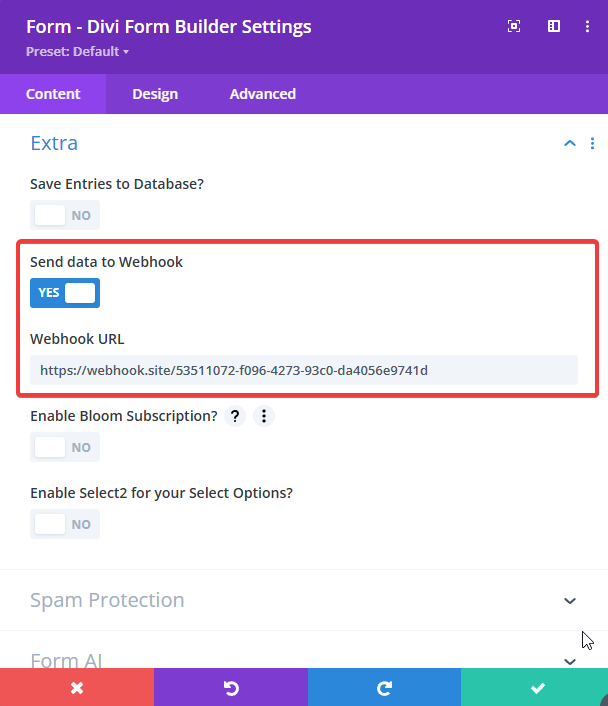
How to Enable Webhooks
- Open your form settings in Divi Form Builder.
- Navigate to the
Extrasection of the settings. - Enable the
Send to Webhooktoggle. - Paste your Webhook URL into the input field.
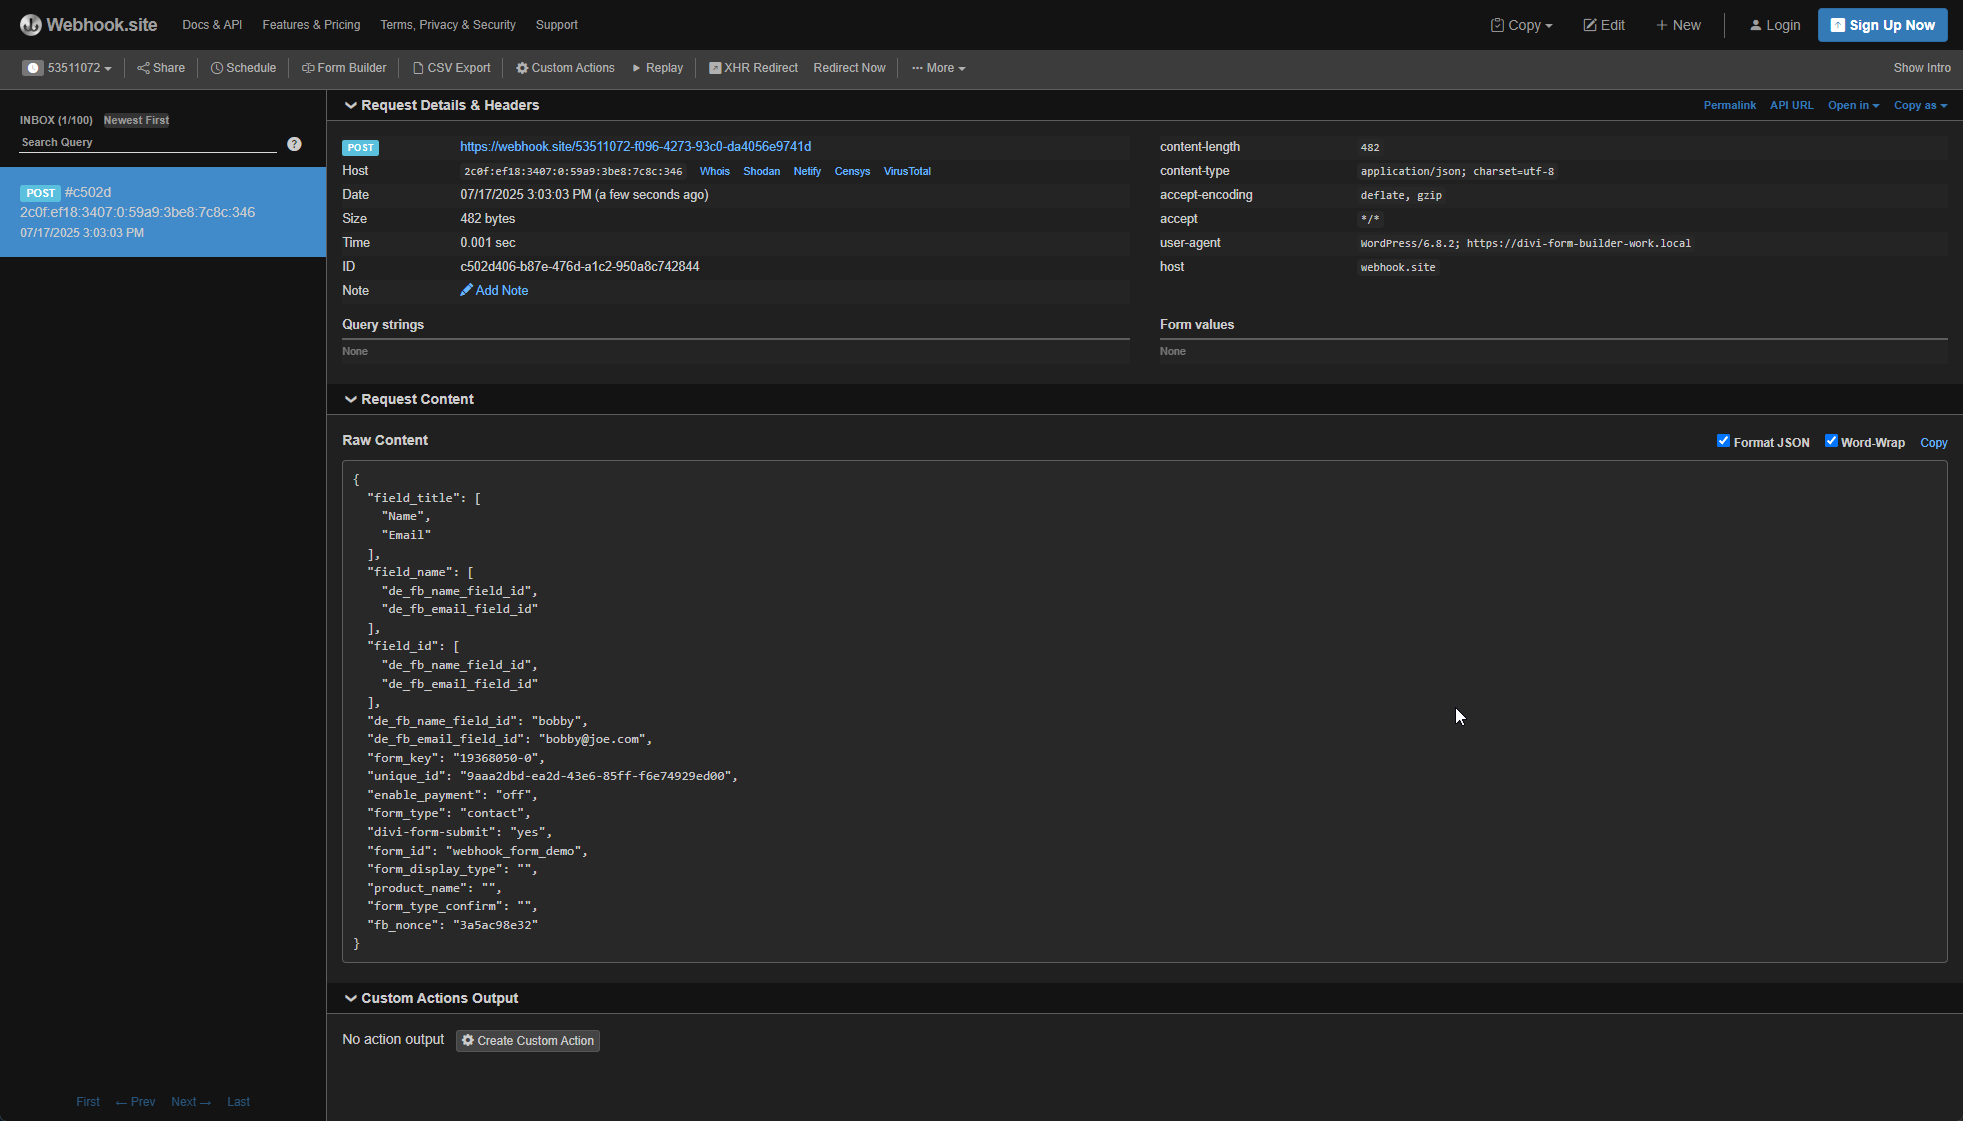
Understanding the Payload
When a form is submitted, a POST request is sent to the specified webhook URL with a JSON payload. Here's an example of the data structure:
{
  "field_title": ["Name", "Email"],
  "field_name": ["de_fb_name_field_id", "de_fb_email_field_id"],
  "field_id": ["de_fb_name_field_id", "de_fb_email_field_id"],
  "de_fb_name_field_id": "Bob",
  "de_fb_email_field_id": "[email protected]",
  "form_key": "19368050-0",
  "unique_id": "9aaa2dbd-ea2d-43e6-85ff-f6e74929ed00",
  "enable_payment": "off",
  "form_type": "contact",
  "divi-form-submit": "yes",
  "form_id": "webhook_form_demo",
  "form_display_type": "",
  "product_name": "",
  "form_type_confirm": "",
  "fb_nonce": "c0ddb376a7"
}
Key Fields Explained
field_title: An array of form field labels.field_name: An array of internal field names.field_id: An array of field IDs used in the form.- Custom field keys (like
de_fb_name_field_id) contain the actual submitted values. form_keyandunique_id: Help identify and track form submissions.enable_payment: Indicates whether payment was enabled in the form.form_id: The unique ID of the form on the frontend.
tip
Use this payload structure to parse and route data correctly in your endpoint handler.
Common Use Cases
- Connect to Zapier, Make (Integromat), Pabbly, or n8n
- Trigger custom API workflows
- Log form entries into a custom CRM
- Send notifications to Slack or email
Troubleshooting
If your webhook isn't receiving data:
- Make sure the
Send to Webhooktoggle is enabled in the form settings. - Confirm the URL is publicly accessible and accepts
POSTrequests. - Your webhook handler should return a
2xxHTTP response to acknowledge success. - Use tools like RequestBin or Webhook.site to inspect the received payload and headers.